Pages

December 17, 2019

Christmas Ornaments Of Patterns Past

I don't think that post title works but I am too tired to do anything about it.

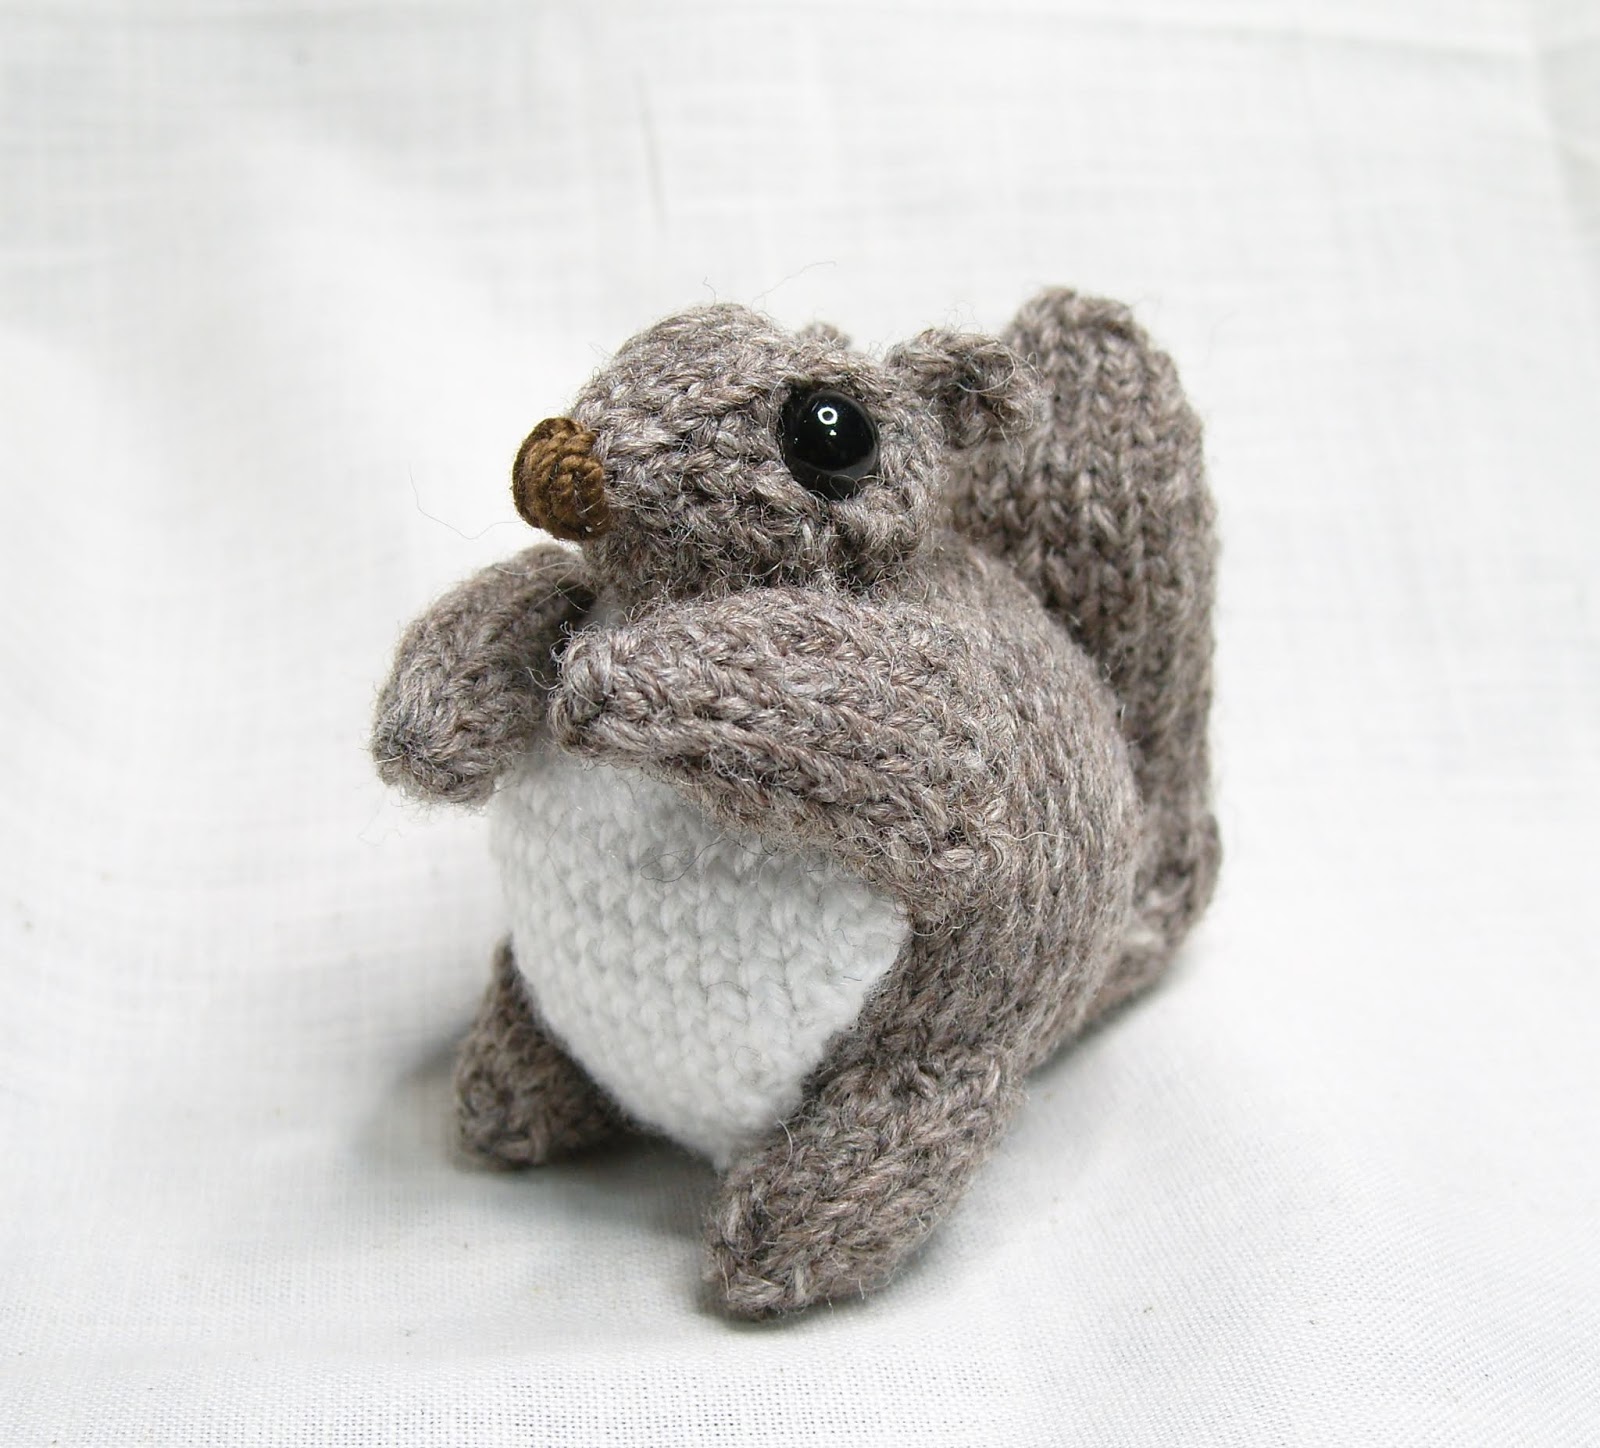
So after the obese squirrel, I wasn't in a rush to create a new ornament. I felt like that rotund fellow covered my bases for the rest of the year, until Puffits and I upgraded our tree from a modest three-footer to a very impressive pre-lit five-footer. It's very extravagant, so much so that it felt like an excuse to get some clip-on fake candles. I friggin' love those phony Christmas tree candles.


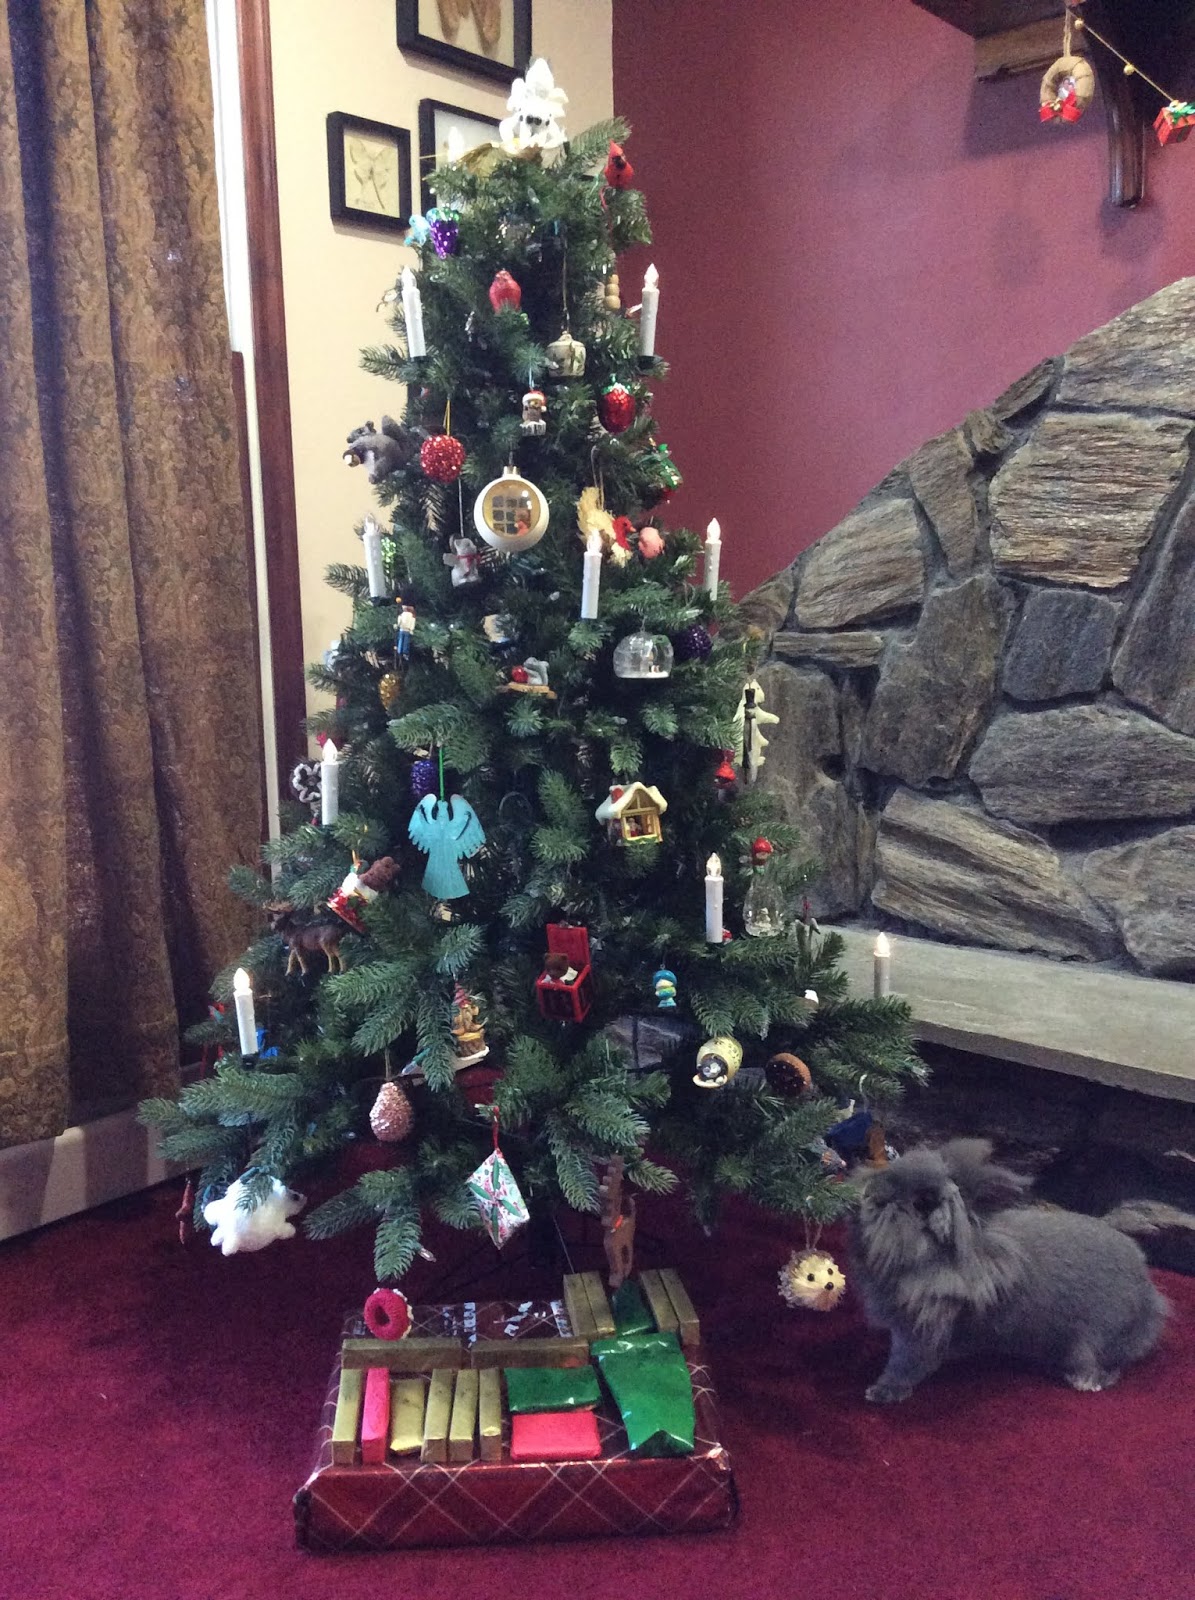
The naughty bunny below the tree is not a present; she lives here. 

The larger tree also put me in an ornament making mood, though not enough of one to crank out a new pattern. Instead, I decided to revise some of my older, non-ornament amigurumi into Christmasy versions.

If you're thinking of attempting any of the below, I am sorry for the lack of details. This is really more of a show-and-tell than an instruction. I can say that two out of the three really don't require you to knit any extra bits. For the like two people that actually work from my patterns, I've seen how you folks do your own remixing. I have every confidence you can figure this stuff out and make it better. Just the same, I'll try to recount as many of the steps I took.

Of course, if there's a truly overwhelming response--like say, from three or four people, all begging for detailed patterns to make the following projects--I will gladly provide them. Not until next year though. I mean c'mon.

 So let's start with the simple yet finicky...

Christmas Spider


To make this one, I just worked the Spooky Sparkly Spider pattern in metallic crochet thread (Aunt Lydia's Metallic 10 in silver). I didn't do any colorwork--well, I did at first, in gold, but it looked just a little too gaudy, even for Christmas. The single color decision was for the best. If you've ever worked with a metallic plyed or sparkle yarn, you know how much of a head/hand ache it is. The stuff is course, splitty, and twists up anywhere there is the slightest slack.

It doesn't seem to matter how the stuff is plyed. I experienced the same difficult using a chain-ply glitter yarn for my sparkly knit Jumping Spider. I love the result but only because memory never fully retains pain. I'm actually thinking about trying another one as I type this. Stop it!

Currently our tree-topper until Puffits woodturns something more conventional. 

Okay, so once the spider was knit, single color, it's just a matter of further sparkling it up to make it suitable as a Christmas tree spider. Silver seed beads for the eyes and a blingy crystal on the abdomen did the trick for my tastes. When attaching all this stuff, I used nylon beading chord. I used the same to create a loop for spider suspension.

As I alluded on Twitter, a Christmas spider is backed by tradition. Even if it wasn't, I'd still have some in my tree. Not sure if this is obvious, but I'm very fond of spiders and I don't understand why they aren't constantly adored and celebrated by all.

Even if you don't share my love for them, here's why you might still have one in your Christmas tree.

A woman was hard at work preparing her home for a Christmas celebration. In the process of cleaning and decorating, the spiders in the house hid in the attic, as not to be swept up or dusted away. When the house quieted later that night, they returned downstairs to find all the beautiful decorations and a lovely tall tree. They explored all these new things excitedly, eager to be part of the glittering festivity. Behind them they left strings of grey silk, unknowing dulling the shine of the woman's hard work. When St. Nicholas arrived at the house, he saw how the spiders had so enjoyed the scene but also feared that the woman would be heartbroken when she'd wake to see her decorations covered in webs. St. Nicholas then transformed the grey webs into threads of silver and gold, further beautifying the home. 

The legend is said to explain the tradition of tinsel inclusion on Christmas trees and why it's lucky to have a spider of some sort in your tree. I try to include at least several each year.

This silverly little friend is the newest.


Gingerbread VooDude

I think I mentioned modifying the recent Tiny VooDoo Doll pattern into a gingerbread man at some point in that post. It was easier than I expected.

I haven't yet tried a fully-stuffed, sitting-upright version. Instead the result resembles the thicker cookies I make. I know it's controversial, but I like a thicker, chewer gingerbread. The trick is extra molasses.

When it comes to knitting them, the trick is under-stuffing and flatting them as you go. Instead of the short rows that enable the VooDude to sit up right, I just knit an extra four rounds before dividing for the legs. I think that amounts to a decent gingerbread man torso. The arms are still the same, just keep them barely stuffed and flatten them out before and after attaching to the body.


Now, the picture makes it quite clear, but I still want to emphasize that I am crap at embroidery. It requires that I actually look at what I'm doing and think about it before I do it. Frankly, that's not my style. I trust you'll do better.

I tried safety eyes on the larger fellow and embroidered on the smaller. I remain unsure of which I prefer.

Some white glittery yarn was haphazardly stitched in place for the icing cuffs and smile. The green buttons are ribbon that's been overlapped. Feel free to use actual small buttons or whatever you can attach that will look like candy or icing. I didn't have any that I liked but I did find Dress It Up buttons in glittery candy canes and gumdrops.


Christmas Pudding Spite


I've noticed a increase in the amount of Christmas pudding iconography in recent years, which is a little weird because I've never actually encountered any sort of plum or boiled pudding in reality.

Here in the States, or at least in my region/personal experience, it's cookies, pies, red and green nem-em-nems, and yes, Christmas Donuts. And while I grew up with fruit cake and panetonne always being present on the table, I'd never see anyone actually cut into it--let alone eat it. It might as well've been a candle holder.

I never tasted nor met the ole Christmas pudd in person but it's easy to recognize similarities in its stout dome shape and the structure of the Fungispite.

Like the Christmas spider, there's nothing to change from the original pattern. The yarn just needs to be a good pudd color. The add-ons are what finishes the job.

The icing is made by casting on about five or six stitches and joining in the round to make a cap. I increased around evenly--every other stitch and then every two stitches--until the circle was just wide enough to top the sprite's head, figure about four rounds.  Then I created the drips.


I started by binding off two or three stitches, then I knit across three or four stitches, turned without wrapping to purl, and turned again, essentially creating just enough length to indicate a drip. I decreased at the first and last stitch and then drew-through. I cut the yarn, reattached it to bind off an additional two or three stitches, and then worked back and forth across a few more to create the next drip. I varied the width and length of each and ended up with about five drips with enough of a gap between each to fit around the sprite's eyes--like a little sugary powdered wig...with some strange bangs.

There were a lot of ends to weave in and some that were used to attach the end and sides of each drip to the sprite.

It was then time to move on to the holly garnish. The knitted berries on the larger sprite were made by casting on two stitches, increasing several times in both, and then drawing through all and pulling tight, kind of like making a freestanding bauble stitch. Apparently I didn't want to do it again with the thinner crochet thread so I used beads. I think I like the glassy sheen on the beads better, though it is more cherry-like. I don't know if that's a issue with traditional puds. It shouldn't be. It's called a plum pudding but I understand it's loaded with raisins. Ugh.


With the holly leaves, I'm not even sure I can describe what I did in any helpful way. I cast-on like six or seven stitches, knit back and forth on two or three of them, and then bound off those few before doing the same with those that remained. My intent was the create a spot of dark green with a jagged edge like a holly leaf. I don't think the result was very convincing but it didn't seem to matter when it all came together on something so small.


I could probably think of a better way to do it if I were to make a proper pattern, which I'm not going to do unless, as mentioned, there's quite a clamor for it.

So there you have it. Merry all the things. Merry nothing as well, because sometimes the nothing is the best part when there is so much something happening, as there tends to be this time of year.

And whatever this year brought, I really do hope 2020 is better. I aim to keep making stuff either way and I thank you if you're along for it.

November 19, 2019

Obese Squirrel Ornament - Free Pattern


I’m not a big fan of squirrels. A family of them once moved into the roof of the cottage and made my nights pretty miserable with the racket from all their… squirrel business. The only thing worse was when the raccoon moved in the following winter and then gave birth to a litter above my bedroom. How did I end up with so much wildlife as “upstairs” neighbors? I’ll just say my landlord wasn’t very proactive about anything, including repairing major access points in the roof. And as someone who can confidently state there is no such thing as a truly “squirrel-proof” bird-feeder, they still get on my nerves.

There is one variety of squirrel I very much enjoy and look forward to this time of year: the morbidly obese type

So I thought, what better way to celebrate fall and stave off seasonal affective disorder than to create a morbidly obese squirrel ornament pattern using an ordinary pingpong ball.


The pattern is something of a variation and a little bit of an improvement—I think—on the Fat Cat Bauble pattern. I think the pingpong ball is somewhat easier to work with than the plastic bauble.

Pingpong balls are also easier to find year-round. You probably won’t even need to go to a sporting goods store; I got mine in the grocery store—same aisle as the Solo cups.


You could still fit this pattern to plastic craft bauble. I’ll provide some notes on that at the end of the body portion below. You can also skip the bell/acorn part and just leave the paws free or attach all manner of other objects: little knit walnuts, tiny jars of peanut butter, chunks of insulation from my old roof.  

So here’s what you’ll need to make your own obese squirrel bauble ornament:

Yarn and Needles:
I used Paton’s Kroy Socks yarn for the majority of the squirrel. The color is Flax. A few dozen yards of any sock weight/fine yarn should do. The belly is knit in white Caron Simply Soft Light. Sadly, it’s been discontinued, but any sock weight yarn in an appropriate belly color should do. The acorn cap over the bell is made with Woollike from Loops & Threads, a super fine yarn that’s a Micheal’s exclusive. The color is chocolate. A small amount of brown crochet thread has been used to embroider the nose.  

You’ll need 4 DPNs (double pointed needles) - size US 1 (2.22mm).

Gauge: 10 sts for 14 rows in stockinette = 1 inch (2.54 cm)
Unlike most of my patterns, gauge matters a bit for this one-- mostly because you’ll want to make sure the pingpong ball is properly covered and all the other parts are in proportion.

Additional Supplies:
A pingpong ball for the body, a small amount of stuffing or yarn scraps, safety eyes (7.5mm for the size shown in the photos), a 1/2 inch (12.7 mm) jingle bell, cord or ribbon to suspend the ornament, a tapestry needle for assembly, and straight pins--if needed--to assist with positioning during assembly.

Techniques And Abbreviations:
Knit-in-the-Round
Knit Straight
Cast On (CO)
Bind Off (BO)
Knit (K)
Purl (P)
Make One (M1)
Knit Front and Back (Kfb)
Knit Two Together (K2tog)
Slip slip knit (ssk)
Slip (Sl)
Pass slipped stitch over (psso)
Draw-Through
Round (Rnd)
Short Row (Srt Row)
Wrap & Turn (W&T)
Stitch/es (st/s)

Total stitches are indicated within ( ) after increase and decrease rounds. Stitches to be repeated are indicated within [ ] followed by the number of repeats.

The pingpong ball cover is knit in one piece. The head, tail, and limbs are knit separately and attached. The acorn cap is knit separately, attached to the bell, and stitched between the squirrel’s paws.


Body - Covering the Pingpong Ball
CO 6 sts, distribute evenly on 3 DPNs (2 sts per needle to start) and knit the following rnds:

Rnd 1. [K1, M1, K1] 3 times (9 sts)
Rnd 2. [Kfb, K1, Kfb] 3 times (15 sts)
Rnd 3. [Kfb, K3, Kfb] 3 times (21 sts)
Rnd 4. [Kfb, K5, Kfb] 3 times (27 sts)

Continue in this manner—inc on the first and last st of each DPN—until there are 17 sts on each needle (51 sts total).

Knit 8 rnds even before beginning decrease rnds below. 

To decrease:

Dec Rnd 1. [K2tog, K13, Ssk] 3 times (45 sts)
Dec Rnd 2. [K2tog, K11, Ssk] 3 times (39 sts)
Dec Rnd 3. [K2tog, K9, Ssk] 3 times (33 sts)

Continue in this manner, checking to ensure that the pingpong ball can be easily slipped inside. Once there is resistance, leave the pingpong ball within and knit until there are 3 sts on each needle (9 sts total). You’ll need to stretch yarn as you go to make it easier to knit while the pingpong ball is inside. 

To close up the yarn:

Sl 1, ssk, psso. 1 st now remains on each DPN (3 sts total). 

Cut yarn and draw through remaining sts.

Notes on adapting this pattern to a plastic bauble:

If you are knitting this to cover a plastic bauble, you’ll need to adapt the above steps to fit the circumference of the bauble.  You may want to increase the yarn weight and DPN size. It will probably also be necessary to work more increase rnds.  Once you’ve increased enough to fit the circumference of the bauble, knit enough even rnds to easily pull the cover to the upper third of the bauble’s height, then begin decreasing.

This may require some trial and error.  Too few sts and rnds will make the yarn appear stretched and reveal large gaps.  Too many will cause bunching where each DPN meets the next.  There should be just enough give to allow the bauble to be easily slipped into the yarn after the first several decrease rnds are worked.  Stop decreasing when the cover can be easily pulled up to the top opening/spring cap.  Cut the yarn and draw through remaining stitches, securing the cover in place so it fits around the neck of the opening. You can then use the tail to close any gaps from where the DPNs met.

Check out the Fat Cat Bauble pattern to see how this looks. 

Head and Belly
CO 6 sts on 3 DPNs and knit the following rnds: 

Rnd 1. [K1, Kfb] 3 times (9 sts)
Rnd 2. K all sts
Rnd 3. [K1, Kfb, K1] 3 times (12 sts)
Rnd 4. [K1, Kfb] twice, K4, [Kfb, K1] twice (16 sts)
Rnd 5. K all sts
Rnd 6. [K2, Kfb] twice, K4, [Kfb, K2] twice (20 sts)

The following short rows will round the back of the squirrel's head. 

Srt Row 1. K15, W&T
Srt Row 2. P10, W&T
Srt Row 3. K9, W&T
Srt Row 4. P8, W&T
Srt Row 5. K9, W&T - Now working wrapped stitches.
Srt Row 6. P10, W&T
Srt Row 7. K11, W&T
Srt Row 8. P12, W&T
Srt Row 9. K17 to end

Resume knitting in the round.

Rnd 1. K all sts
Rnd 2. K2, K2tog, K12, ssk, K2 (18 sts)
Rnd 3. K2, BO 14 sts, K2 (4 sts)

Put remaining 4 sts on one needle to knit belly.


Break body yarn, leaving enough of a tail to assist with assembly later, and attach white/belly yarn and knit the following rows.

Row 1. [Kfb] 4 times (8 sts)
Row 2. P all sts
Row 3. Kfb, K6, Kfb (10 sts)
Row 4. P all sts
Row 5. Kfb, K8, Kfb (12 sts)
Row 6. P all sts
Row 7. Kfb, K10, Kfb (14 sts)
Row 8. P all sts
Row 9. Kfb, K12, Kfb (16 sts)
Row 10. P all sts
Row 11.  K2tog, K12, ssk (14 sts)
Row 12. P all sts
Row 13. K2tog, K10, ssk (12 sts)
Row 14. P all sts
Row 15. K2tog, K8, ssk (10 sts)
Row 16. P all sts
Row 17. K2tog, K6, ssk (8 sts)
Row 18. P all sts
Row 19. K2tog, K4, ssk (6 sts)
Row 20. P all sts
Row 21. K2tog, K2, ssk (4 sts)


BO, leaving a long tail.


Ears
Make two
CO 4, leaving a long tail, and knit the following rows:

Row 1. K1, [Kfb] twice, K1 (6 sts)
Row 2. P2, P2tog, P2 (5 sts)
Row 3. K1, Sl 1, Ktog, psso, K1 (3 sts)
Row 4. Sl 1, P2tog, psso.

Draw through to close.


Front Paws
Make two
CO 6, leaving a long tail, and knit the following rows:

Row 1. K1, Kfb, K2, Kfb, K1 (8 sts) 
Row 2. P all sts
Row 3. K1, Kfb, K4, Kfb, K1 (10 sts)
Row 4. P all, CO 2 sts. (12 sts)
Row 5. K all sts 

Distribute all sts on 3 DPNs to knit the following rnds:

Rnds 1- 4. K all sts
Rnd 5. [K1, K2tog, K1] 3 times (9 sts)
Rnds 6-8. K all sts
Rnd 9. [Sl 1, K2tog, psso] 3 times (3 sts)

Cut yarn and draw through remaining sts.

Lightly stuff the lower portion of the paw.


Back Feet
Make two
CO 6, leaving a long tail, and knit the following rows:

Row 1. K1, Kfb, K2, Kfb, K1 (8 sts) 
Row 2. P all sts
Row 3. K1, Kfb, K4, Kfb, K1 (10 sts)
Row 4. P all, Co 2 sts. (12 sts)
Row 5. K all sts

Distribute all sts on 3 DPNs to knit the following rnds:

Rnds 1-3. K all sts
Rnd 4. [K1, K2tog, K1] 3 times (9 sts)
Rnd 5. [Sl 1, K2tog, psso] 3 times (3 sts)

Cut yarn and draw through remaining sts.

Lightly stuff the lower portion of the foot.


Tail
CO 9, leaving a long tail, and knit the following rnds:

Rnds 1-2. K all sts
Rnd 3. [Kfb, K1, Kfb] 3 times (15 sts)
Rnds 4-7. K all sts
Rnd 8. K5, Kfb, K3, Kfb, K5 (17 sts)

Base of tail short rows: 

Srt Row 1. K13, W&T
Srt Row 2. P11, W&T
Srt Row 3. K10, W&T
Srt Row 4. P9, W&T
Srt Row 5. K8, W&T
Srt Row 6. P7, W&T
Srt Row 7. K8, W&T - Now working wrapped sts.
Srt Row 8. P9, W&T
Srt Row 9. K10, W&T
Srt Row 10. P11 W&T
Srt Row 11. K to end

Resume knitting rnds.

K 10 rnds even.

Top of tail short rows

Srt Row 1. K5, W&T
Srt Row 2. P10 (Knitting past start of the rnd.) W&T
Srt Row 3. K9, W&T
Srt Row 4. P8, W&T
Srt Row 5. K7, W&T
Srt Row 6. P6, W&T
Srt Row 7. K3, to end

Resume knitting in the round, picking up wraps as you come to them: 

Rnds 1-3. K all sts
Rnd 4. K4, [K2tog] twice, K1, [ssk] twice, K4 (13 sts)
Rnd 5. K4, K2tog, K1, ssk, K4 (11 sts)
Rnd 6. K1, K2tog, K5, ssk, K1 (9 sts)

Stuff the tail so it is firm but flexible.

Rnd 7. [S1, K2tog, psso] 3 times (3 sts)  

Draw through to close.


Acorn Cap
CO 9 on DPNs and knit in the following rnds:

Rnds 1-2. K all sts
Rnd 3. [Kfb, K1, Kfb] 3 times (15 sts)
Rnd 4. Kfb, K3, Kfb] 3 times (21 sts)
Rnd 5. [Kfb, K5, Kfb] 3 times (27 sts)
Rnd 6. [Kfb, K7, Kfb] 3 times (33 sts)
Rnd 7. P all sts

BO, leaving a long tail.

To adapt the acorn cap to a bell that is larger or smaller, knit more or fewer increase rnds. You'll want to stop increasing when the cap just reaches the widest point at the top of the bell, then P one or more even rnds so it curls over the bell's edge.


Assembly:

Stitch up any gaps in the body left from where the DPNs met.


Position and place the safety eyes on the head. Attach the ears, each one just above each eye, and embroider a nose. Lightly stuff the head with yarn scraps or stuffing.


Use the long tails from the CO portion of these pieces to assist in the following assembly. 

Attach the head to the body.


Sew by slipping the stitches between the pingpong ball and the knitted cover. Use straight pins to assist with the positioning. I like to start with one side, working around the back toward the front.

Sew all the way around the neck using the body yarn. Switch to white yarn to attach the belly, spreading it flat across the front and stitching around the edges.


Next, attach the CO portion of tail on the opposite end of the body, just a small distance away from the center. You’ll want the tip of the tail to come near or slightly higher than the height of the head.


Attach the front paws, but take care lining them up so the ends almost touch in front of the belly.


Start by sewing the CO edge right where the edge of the belly meets the body. Sew all the way around.


Repeat that process for the back feet, aligning the CO end with the edge of the belly.

Place the acorn cap over the bell. Secure it in place by weaving the BO tail in between the four splits in the sides and the opening at the top of the bell.


Once the cap is thoroughly fixed in place, use a few stitches to attach it to the squirrel’s front paws.    

Use a length of cord or ribbon to create a loop to suspend the squirrel from a hook or branch.


This squirrel is dedicated to Jen because of our shared appreciation of incredibly fat squirrels. Thank you, Jen, and thank you for also coming up with the name Rosemarsh-- even if you were just making fun of me.

Happy knitting as always, friends. Maybe there will be more ornament updates before the year is out--perhaps a redux on an old pattern or two. We'll see how yet another dark, chilly knitting season shakes up.

October 13, 2019

Tiny VooDoo Doll - Free Pattern


So I’m keeping it simple this year with my Halloween pattern. 

Not a lot of legs on this one; the whole job is done in three pieces and a lack of precision with embroidery is favorable.  Don’t worry, I’m not through with spiders but I don’t want to fall into too much of a pattern-pattern.

So why not knit your very own pocket sized voodoo doll?

Or voo-dude as Puffits and I have been calling it.

I know there are a lot of patterns out there for making them—if you even need a pattern, as they’re essentially a few shapes put together to create a human form—but I wanted mine to have a specific look and structure. 

Mostly I wanted one that could sit up on its own, on a desk, the dashboard of a car, or beside you on a park bench—should you see anyone littering…

I feel like I need a disclaimer.

I advise only using your voodoo doll for good… 
That’s somewhat vague and subjective statement. 

Let’s just say, your pins: your consequences. 


Okay then, let’s get on to what you need.


Yarn and Needles:

The dolls in the photos are made with Cotton Fair from Premier Yarns, which is a 2/fine weight. You shouldn’t need more than maybe a couple dozen yards, if that.   

You’ll need four double pointed needles (DPNs) as most of the pattern is knit in the round. I used U.S. size 2 (2.75 mm)

This combo yields a doll that is roughly 2.5 inches from head to butt and 1.5 inches from butt to feet.  

Additional Supplies: 

Stuffing: Polyfill can be used but it’s not ideal in this case, particularly if you’re going to be using your doll as a pincushion. You’ll want something a little sturdier. I’ve gotten good results with wool roving/spinning fiber. You can use yarn scraps, bits of fabric, or even create a small fabric pouch with sand or sawdust. As I’ve recently learned, that’s how pin cushions were used back in the day. 

Stitch holder: To hold stitches when the legs are divided.

Embroidery floss or thin crochet thread: I recommend a contrasting color. You may also want to give your doll button or bead eyes but that’s option. Personally I prefer the look of a couple Xs.

Tapestry needle: To assemble and embroider. 


Techniques And Abbreviations

Knit-in-the-Round
Knit Straight
Cast On (CO)
Knit (K)
Purl (P)
Knit Front and Back (Kfb)
Knit Two Together (K2tog)
Slip slip knit (Ssk)
Sl (Slip)
Psso (Pass slipped stitch over)
Draw-Through
Round (Rnd)
Short Row (Srt Row)
Wrap & Turn (W&T)
Stitch/es (st/s)

Total stitches are indicated within ( ) after increase and decrease rounds. Stitches to be repeated are indicated within [ ] and { }.

The body and the legs are knit in one piece. The arms are knit separately and attached.


Body 

Starting at the top of the head, CO 6 sts and join on DPNs to knit the following rounds:

Rnd 1: [K1, Kfb] 3 times. (9 sts)
Rnd 2: [K1, Kfb, K1] 3 times. (12 sts)
Rnd 3: [K1, {Kfb} twice, K1] 3 times. (18 sts)
Rnd 4: [K1, Kfb, K2, Kfb, K1] 3 times. (24 sts)
Rnds 5-7: K all sts.
Rnd 8: [K1, K2tog, K2, Ssk, K1] 3 times. (18 sts)
Rnd 9: K all sts.
Rnd 10: [K1, K2tog, Ssk, K1] 3 times. (12 sts)
Rnd 11: K all sts.
Rnd 12: K1, [Kfb] twice, K6, [Kfb] twice, K1. (16 sts)
Rnd 13: K all sts.
Rnd 14: K1, Kfb, K2, Kfb, K6, Kfb, K2, Kfb, K1. (20 sts)
Rnd 15: K all sts.
Rnd 16: K1, Kfb, K4, Kfb, K6, Kfb, K4, Kfb, K1. (24 sts)
Rnds 17-22: K all sts.

You can stuff the head and upper body at this point but you’ll also have the opportunity to do so a little later.

The following short rounds will turn the body so the doll sits upright. If you’d like your doll to lay flat or appear as though it’s standing upright, skip this part and move on to the legs.

Short Rows

Srt Row 1: K6, W&T
Srt Row 2: P12, W&T (Knitting past the beginning of the round.)
Srt Row 3: K11 W&T
Srt Row 4: P10 W&T
Srt Row 5: K9 W&T
Srt Row 6: P8 W&T
Srt Row 7: K9 W&T (Work the wrap as you come to them.)
Srt Row 8: P10 W&T
Srt Row 9: K11 W&T
Srt Row 10: P12 W&T
Srt Row 11: K6 returning to the beginning of the round.

Knit one more full round before dividing for the legs. 

Legs

You’ll now want to stuff the majority of the body. Depending on your stuffing material, it will be easier to shape and manipulate the doll if the stuffing is in smaller pieces. If you’re using polyfill or roving, pull it apart into smaller portions. If you’re using yarn or fabric scraps, make sure they’re in short and dense/layered portions.

Place the first 12 sts on a holder. Move the remaining 12 sts onto DPNs to knit in the round and create the right leg. 


Try to keep the start and end of the round together so there isn’t a large gap between the first and last stitch. 

Rnds 1-7: K all sts.
Rnd 8: [K1, K2tog, K1] 3 times. (9 sts)
Rnd 9: [Sl 1 st, K2tog, Psso] 3 times (3 sts)

Draw through to close. Weave in end.

Lightly stuff the right leg before moving onto the left. Make sure the body is as stuffed as you like it at this point; it will be much harder to access the interior of your doll once the left leg is knit.   

Shift the 12 sts from the holder onto DPNs. Reattach the yarn at the belly, just behind the last st. If you leave a long tail, it can be used to close up any gap between the leg divide.  

Again, try to keep the start and end of the round tightly together as the first round is completed to minimize the gap between the legs.

Repeat the leg rounds above. Remember to lightly stuff the interior of the leg before the decrease and draw through after completing Rnd 9. 

Arms

The arms start with straight rows and are joined in the round.

CO 4 and knit straight:

Row 1: K1, [Kfb] twice, K1. (6 sts)
Row 2: P all sts, CO 3.  (9 sts)
Row 3: K all sts.

Join with DPNs and knit 7 rnds.

To close: [Sl 1 st, K2tog, Psso] 3 times. (3 sts)

Draw through to close. Weave in end. I like to draw this end up through the interior of the arm and use it as stuffing.

Repeat the above to make a second arm.


Assembly

Attach the arms to the sides of the body, connecting the cast on ends. 
Close up any gap left behind by the leg divide. 


Once assembled, create any decorative seams and stitches and/or accents like a heart.

Embroider a mouth and eyes or use buttons.


Have fun with this part since this is what will define the expression and state of your doll. If you’re crap at embroidery, as I am, this can work in your favor, although there’s nothing wrong with a voodude with very precise yet spooky stitching.  

Of course this is also your opportunity to make it look like someone specific—if you choose—but that’s entirely between you and your victim. Before you go jabbin’ don’t forget all returns three-fold! 


Happy Halloween, friends. 

Stay safe, be kind, knit happy, oh, and hand out the full-size candy bars. 

Seriously, there’s no better way to reap some trick-or-treating joy as an adult than being the house that hands out the full size candy bars. You can freeze what’s left over and make Thanksgiving brownies or cookies but there are never any leftovers once the word gets out.